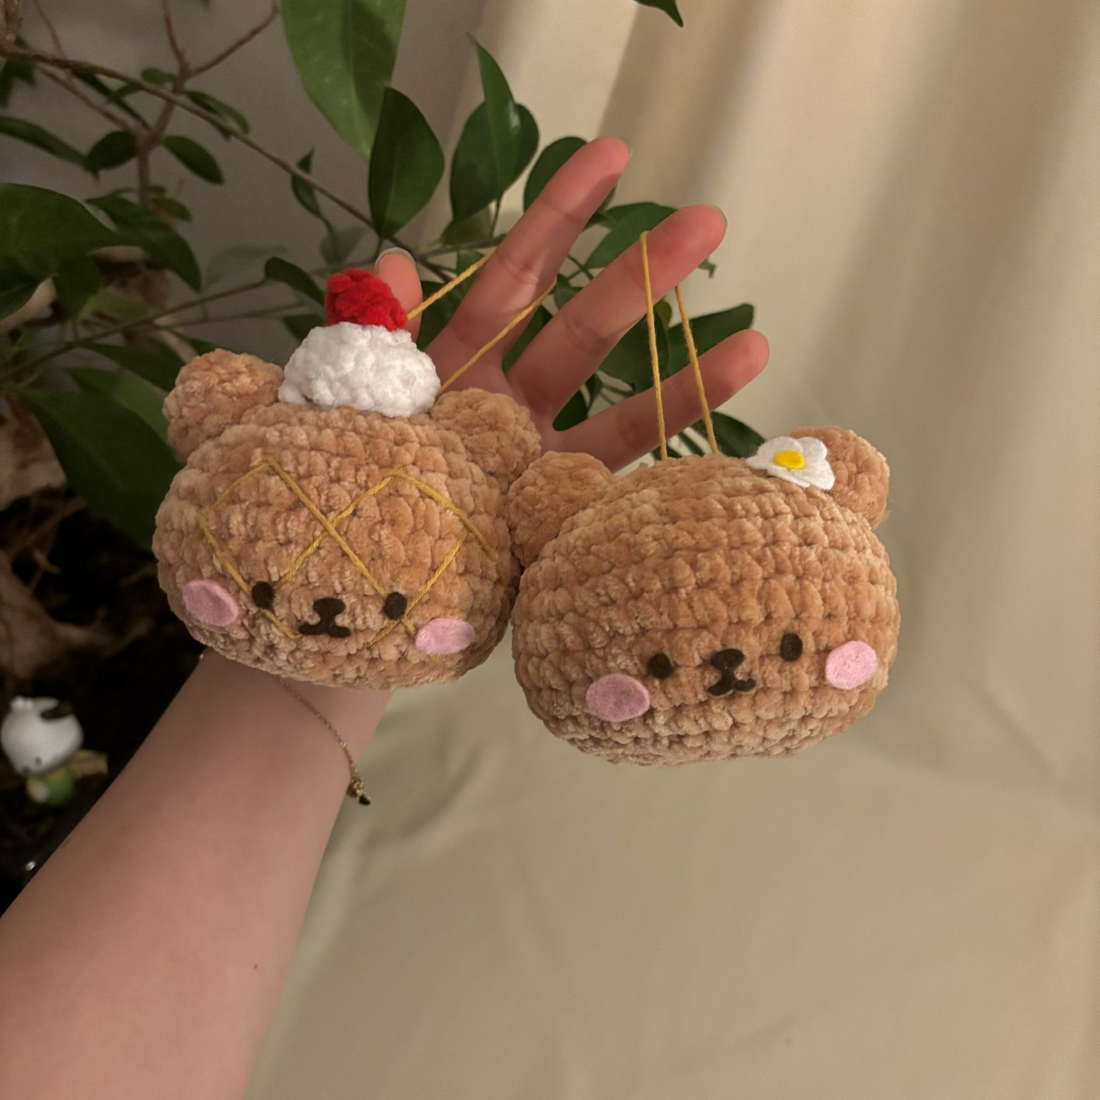
Bear Bun / Melon Pan 2-in-1 Free Pattern
Notes
- This pattern is written in US terminology and works in continuous rounds.
Do not slip stitch and chain after each round. - You can use any kind of yarn and hook size you’d like, the material list only
includes what kind of yarn and hook size is recommended. - Happy crocheting!!! :3

This pattern is only for personal use. Please do not sell, repost, edit, translate or redistribute the pattern in any way. You may sell the finished product, but please credit the owner of the pattern @tofu.soupe
Materials:
- 6mm chenille yarn in light brown, off white and wine red
- 3mm yarn in light brown
- 5mm hook
- Brown and pink felt
- White and yellow felt (optional)
- Scissors
- Embroidery needle
- Polyester filling
- Stitch markers
- Sewing pins
- Glue
Abbreviations:
- Ch = chain
- Sc = single crochet
- Inc = increase
- Dec = decrease
- Dc = double crochet
- BBL st = Bobble stitch (with 5dc)
- Mr = magic ring
- FO = fasten off
- BLO = back loops only
- R = round
Head:
Round 1: Ch7, starting from the 2nd chain from the hook, 6sc, turn your work and 6sc on the other side (12)
Round 2: (sc, inc) *6 (18)
Round 3: 2inc, 6sc, 3inc, 6sc, inc (24)
Round 4: (3sc, inc)*6 (30)
Round 5: (sc, inc)*2, 9sc, (sc, inc)*3, 10sc, inc (36)
Round 6: sc around (36)
Round 7: (4sc, inc, 4sc)*4 (40)
Round 8-10: sc around [3 rounds] (40)
Round 11: (5sc, dec, 3sc)*4 (36)
Round 12: (2sc, dec)*9 (27)
~ Start stuffing after each round
Round 13: (dec, sc)*9 (18)
Round 14: (sc, dec)*6 (12)
~ FO and sew the hole closed (like shown on the photo), hide the tail.


Ears (make 2):
Round 1: 6sc in mr (6)
Round 2: 6inc (12)
Round 3: sc around (12)
~ FO and leave a long tail for sewing
Sew the ears between R1-R5, around 5 sc apart (I like to sew them in a more oval shape, see photo)

Cream:
Round 1: Ch5, starting from the 2nd chain from the hook, 4sc, turn your work and 4sc on the other side (8)
Round 2: 8inc (16)
Round 3: In BLO (2sc, dec)*5, sc (11)
~ FO and leave a long tail for sewing, no stuffing needed
Cherry:
- Ch2, BBL (with 5dc) into second ch
~ FO and leave a long tail for sewing
Sew the cherry on top of the cream

Details:
~ You can skip to the felt details if you’re making Bear Bun


- Sew the cream with the cherry on top of the head [left photo].
- For the first direction, place 2 sewing pins for each line (1 starting point
and 1 end point) on where you want to embroider the lines. You may need to adjust the placements a few times until it looks fine [left photo]. - Then start embroidering the lines using the thin light brown yarn. You can also use a darker color for this if preferred. Repeat the same steps for the other direction [right photo].

| Felt details | ____ rounds tall x ____ sc wide |
| 2 eyes (brown) | 1 x 0,75 |
| 1 snout (brown) | 1,25 x 1 |
| 2 blush (pink) | 1,25 x 2,25 |
| 5 flower petals (white) | 1,25 x 1,25 |
| 1 flower disc (yellow) | 0,75 x 0,75 |


- Now attach a piece of yarn to your Bear Bun/ Melon Pan to make a Christmas ornament. The red dots are where I’ve attached the yarn, but feel free to adjust the placements (note that for the Melon Pan I’ve attached them right between the ears and the cream, and not on top of the cream)!
And….. you’re done!

Thank you so much for using my free pattern <3
I hope you enjoyed making Bear Bun and/or Melon Pan as much as I did!
If you’re planning to post them don’t forget to tag me on Instagram so I can see them!! :]
@tofu.soupe