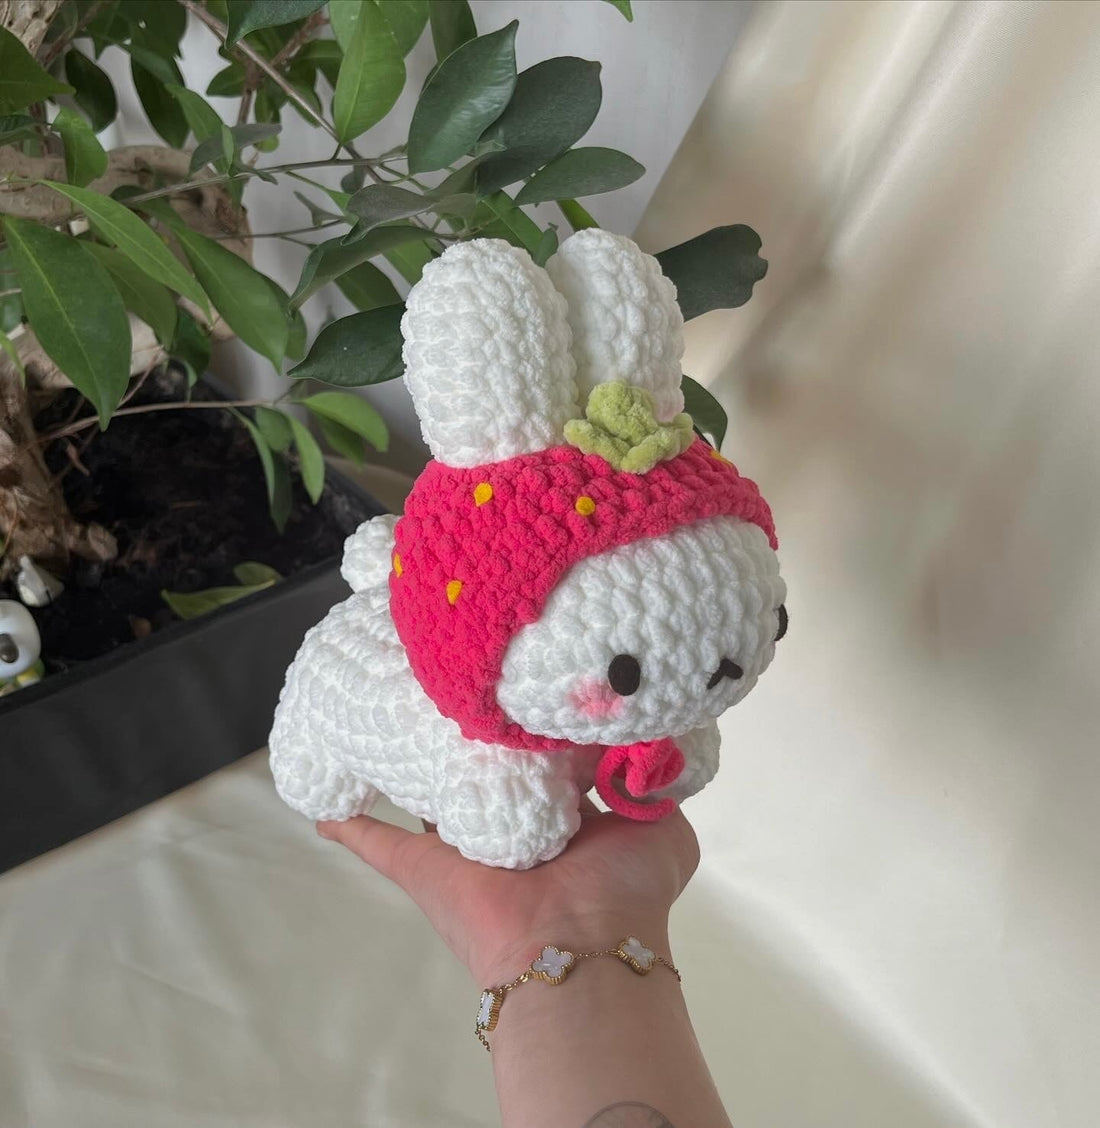
Strawberry Hat Free Pattern
***This hat is meant for the White Bunny Pattern, which you can find by clicking the link!***
Hi! Here you can find the free pattern for the versatile hat, also known as the ‘strawberry hat’.
It's very stylish and it helps keeping your bunny's ears warm ;)
I’m very happy that you’ve clicked on this blog and if you’re planning to make a hat, I hope you enjoy this pattern<3

If you have any questions or difficulties making this hat, please feel free to dm me through Instagram: @tofu.soupe
Notes:
- This hat pattern is made for the White Bunny pattern, which you can find on this website (shop button on the menu), or my Etsy shop.
- This pattern is written in US terminology and works in joined rounds, unless otherwise stated.
- The material only includes what I’ve used for this hat, you can use any kind of yarn and hook size you’d like.
- It is recommended to make the hat with the same yarn and hook size you’ve used for the bunny.
- Have fun!!! :D
Material list:
- 6mm chunky yarn in strawberry pink and green
- 6mm hook
- Yellow felt
- Embroidery needle
- Sewing pins
- Scissors
- Stitch markers
- Glue
Abbreviations:
- Ch = chain
- Mr = magic ring
- Sc = single crochet
- Inc = increase
- Dec = decrease
- Sl st = slip stitch
- FO = fasten off
Please note that we’re going to work in joined rounds! Meaning sl st and ch1 in the next sc at the end of each round!
Hat (in strawberry pink):
Round 1: ch 26, sl st and ch1 (26)
Round 2: 9sc, inc, 6sc, inc, 9sc, sl st and ch1 (28)
Round 3: (4sc, inc, 4sc)*3, sc, sl st and ch1, (31)
Round 4: 6sc, (inc, 5sc)*3, 7sc, sl st and ch1, (34)
Round 5: 7sc, (4sc, inc)*4, 7sc, sl st and ch1, (38)
From now on, we’re going to work in rows. Meaning ch1 and turn your work after each row.
Round 6: 13sc, dec, ch1 and turn, dec, 25sc, dec (27)
Round 7: ch1 and turn, dec (4sc, dec)*3, 5sc, dec (22)

^ It should now look something like this! Put the hat on the bunny to see if it fits right.

^ There should be just a little space (like shown on the photo) or no space at all between the hat and the neck. If you think there is too much space feel free to sc across an extra row before continuing row 8.
In the next few rows, we’re going to make the straps for the hat.

Round 8: ch1, turn, dec, 6sc (7)
Round 9: ch1, turn, dec, 3sc, dec (5)
Round 10: ch1, turn , dec, sc, dec (3)
Round 11: ch1, turn, sc, dec, ch3 (2)
FO and leave a long tail

^ Next, we’re going to make the strap on the other side. Start with sl st and ch1 on the first stitch on the other side of the hat.
Round 1: dec, 6sc (7)
Round 2: ch1, turn, dec, 3sc, dec (5)
Round 3: ch1, turn , dec, sc, dec (3)
Round 4: ch1, turn, sc, dec, ch3 (2)
FO and leave a long tail

Stem:
Round 1: 5sc in mr (5)
Round 2: 3sc, dec (4)
Round 3: sl st in the next stitch, (ch3, sl st in 2nd ch, sl st in the next stitch, )*4 (4)
FO and leave a long tail

- You can now put the hat on the bunny. Sew the stem on the top of the hat, between the bunny’s ears.
- Cut out seeds using yellow felt, and glue them onto the hat

Now pat yourself on the back! Good job:D